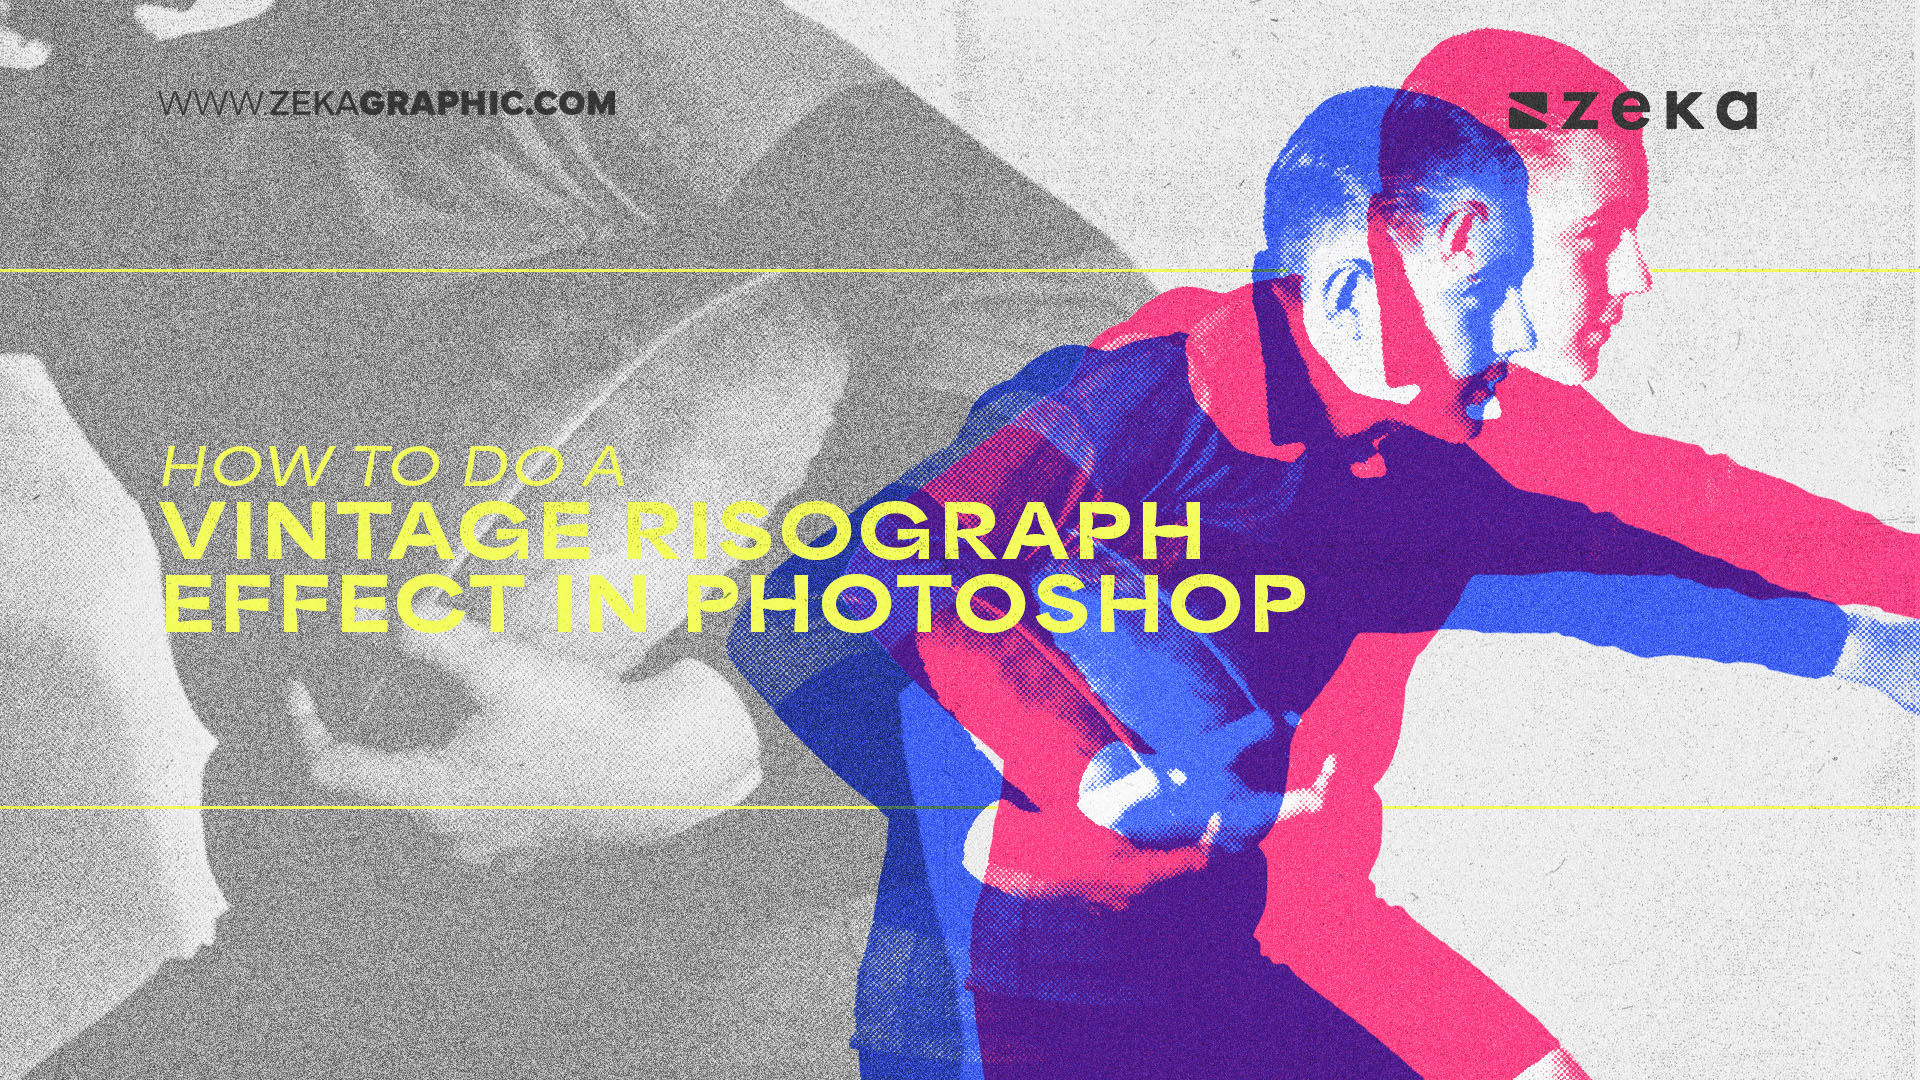
The risograph effect is a favorite among designers for its bold, retro vibe and handmade aesthetic. This tutorial will walk you through creating the signature layered colors, grainy textures, and slight imperfections that define this look—using just Photoshop.
Let’s dive into this fun and creative process that will take your designs back in time!
Advertisment
The risograph effect originates from the Risograph printing process, a technique developed in the 1980s for economical, high-volume printing. This process is known for its vibrant, slightly offset layers of color, grainy textures, and unique imperfections that give each print its one-of-a-kind character.
Risograph printing traditionally uses soy-based inks and stencils to layer colors, resulting in a bold and eye-catching aesthetic that has become a staple in art, design, and publishing.
In digital design, the risograph effect replicates these characteristics using software like Photoshop. By layering bold colors, adding grainy textures, and mimicking misaligned prints, designers can achieve a retro-inspired look. This effect is ideal for anyone looking to infuse their work with a sense of handmade authenticity and artistic flair while staying entirely in the digital space.
Advertisment
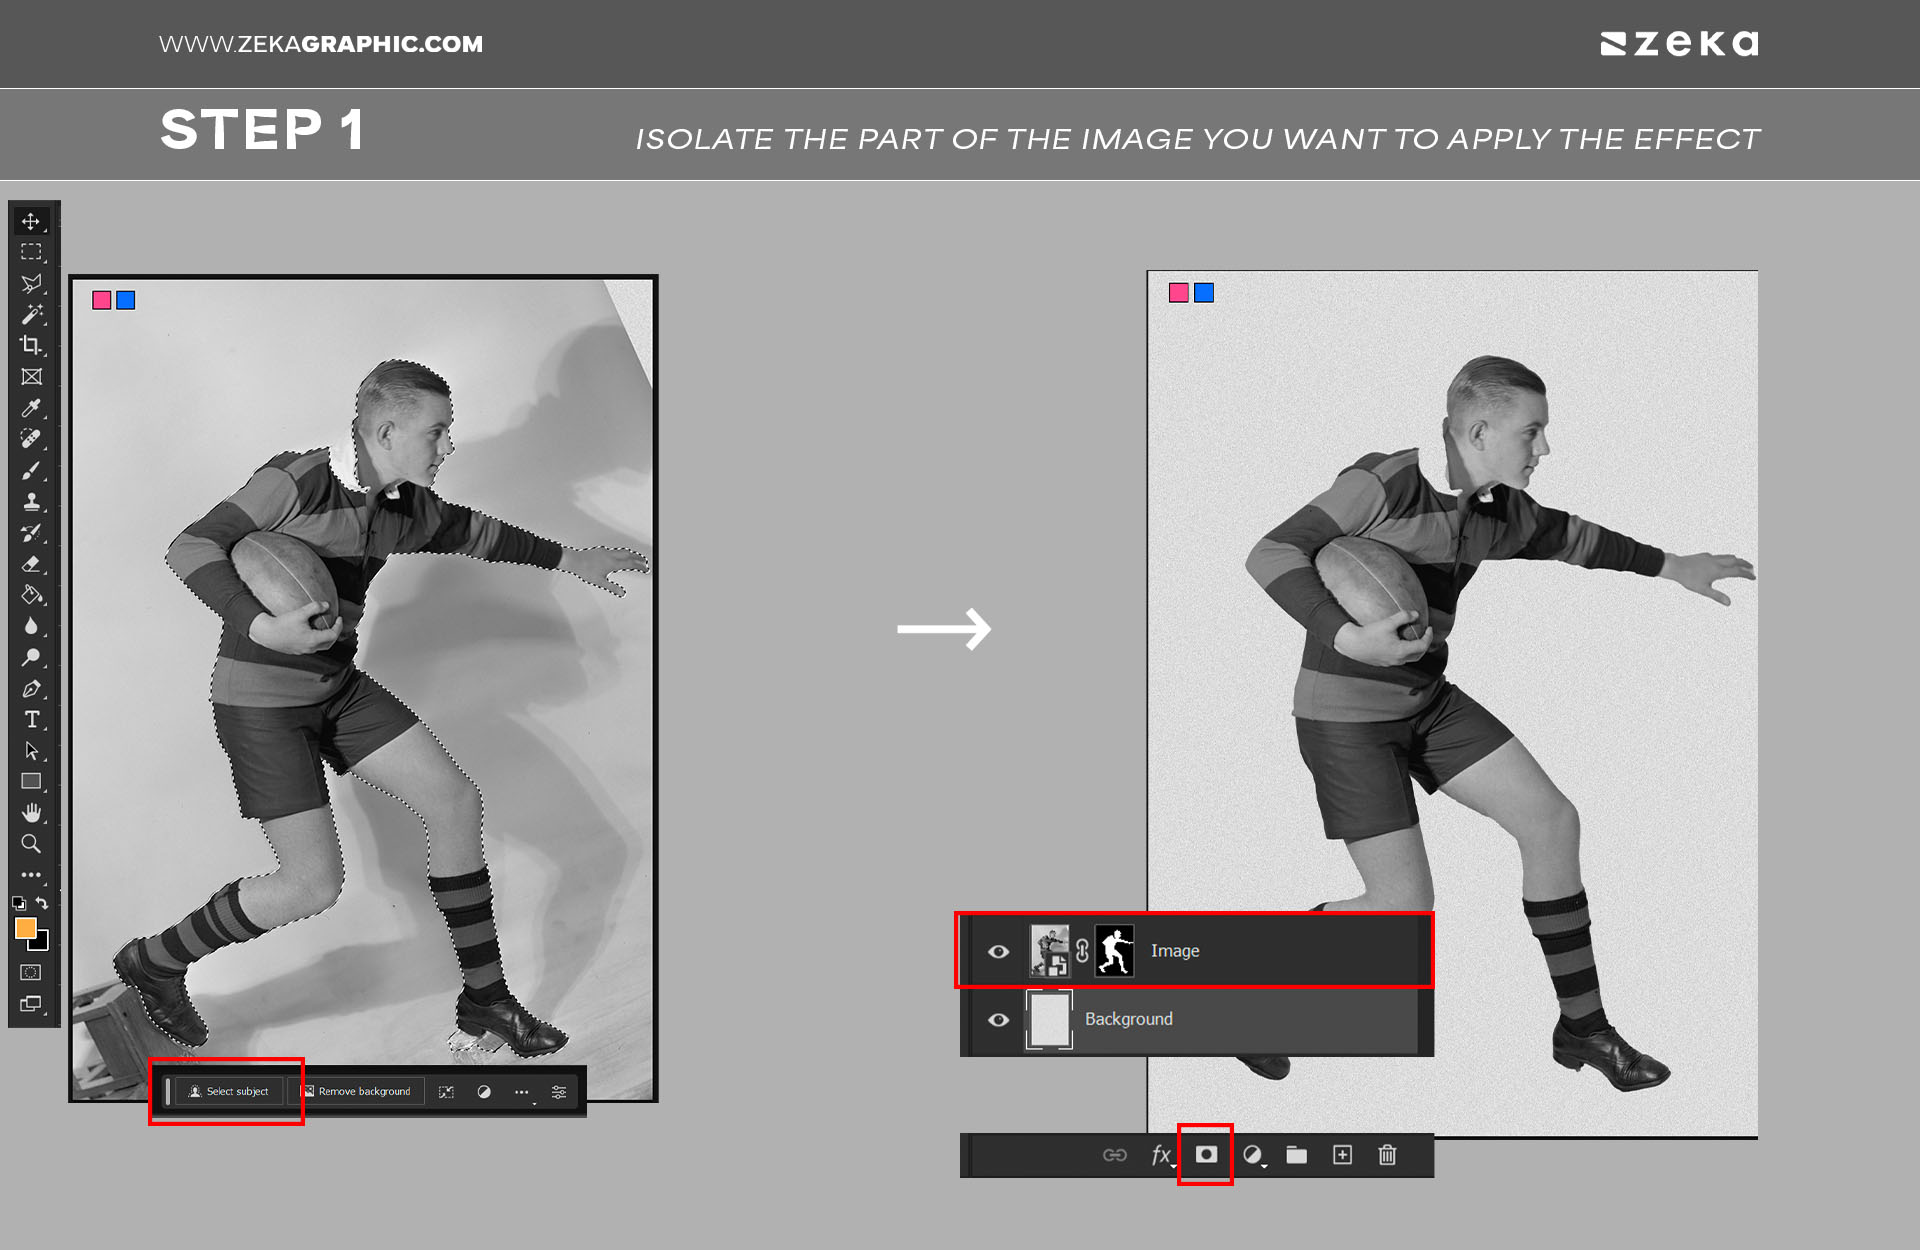
Step 1: Select the part of the image you want to apply the effect with the Pen Tool or select the subject tool and apply a layer mask, later convert the next image into a Smart Object.
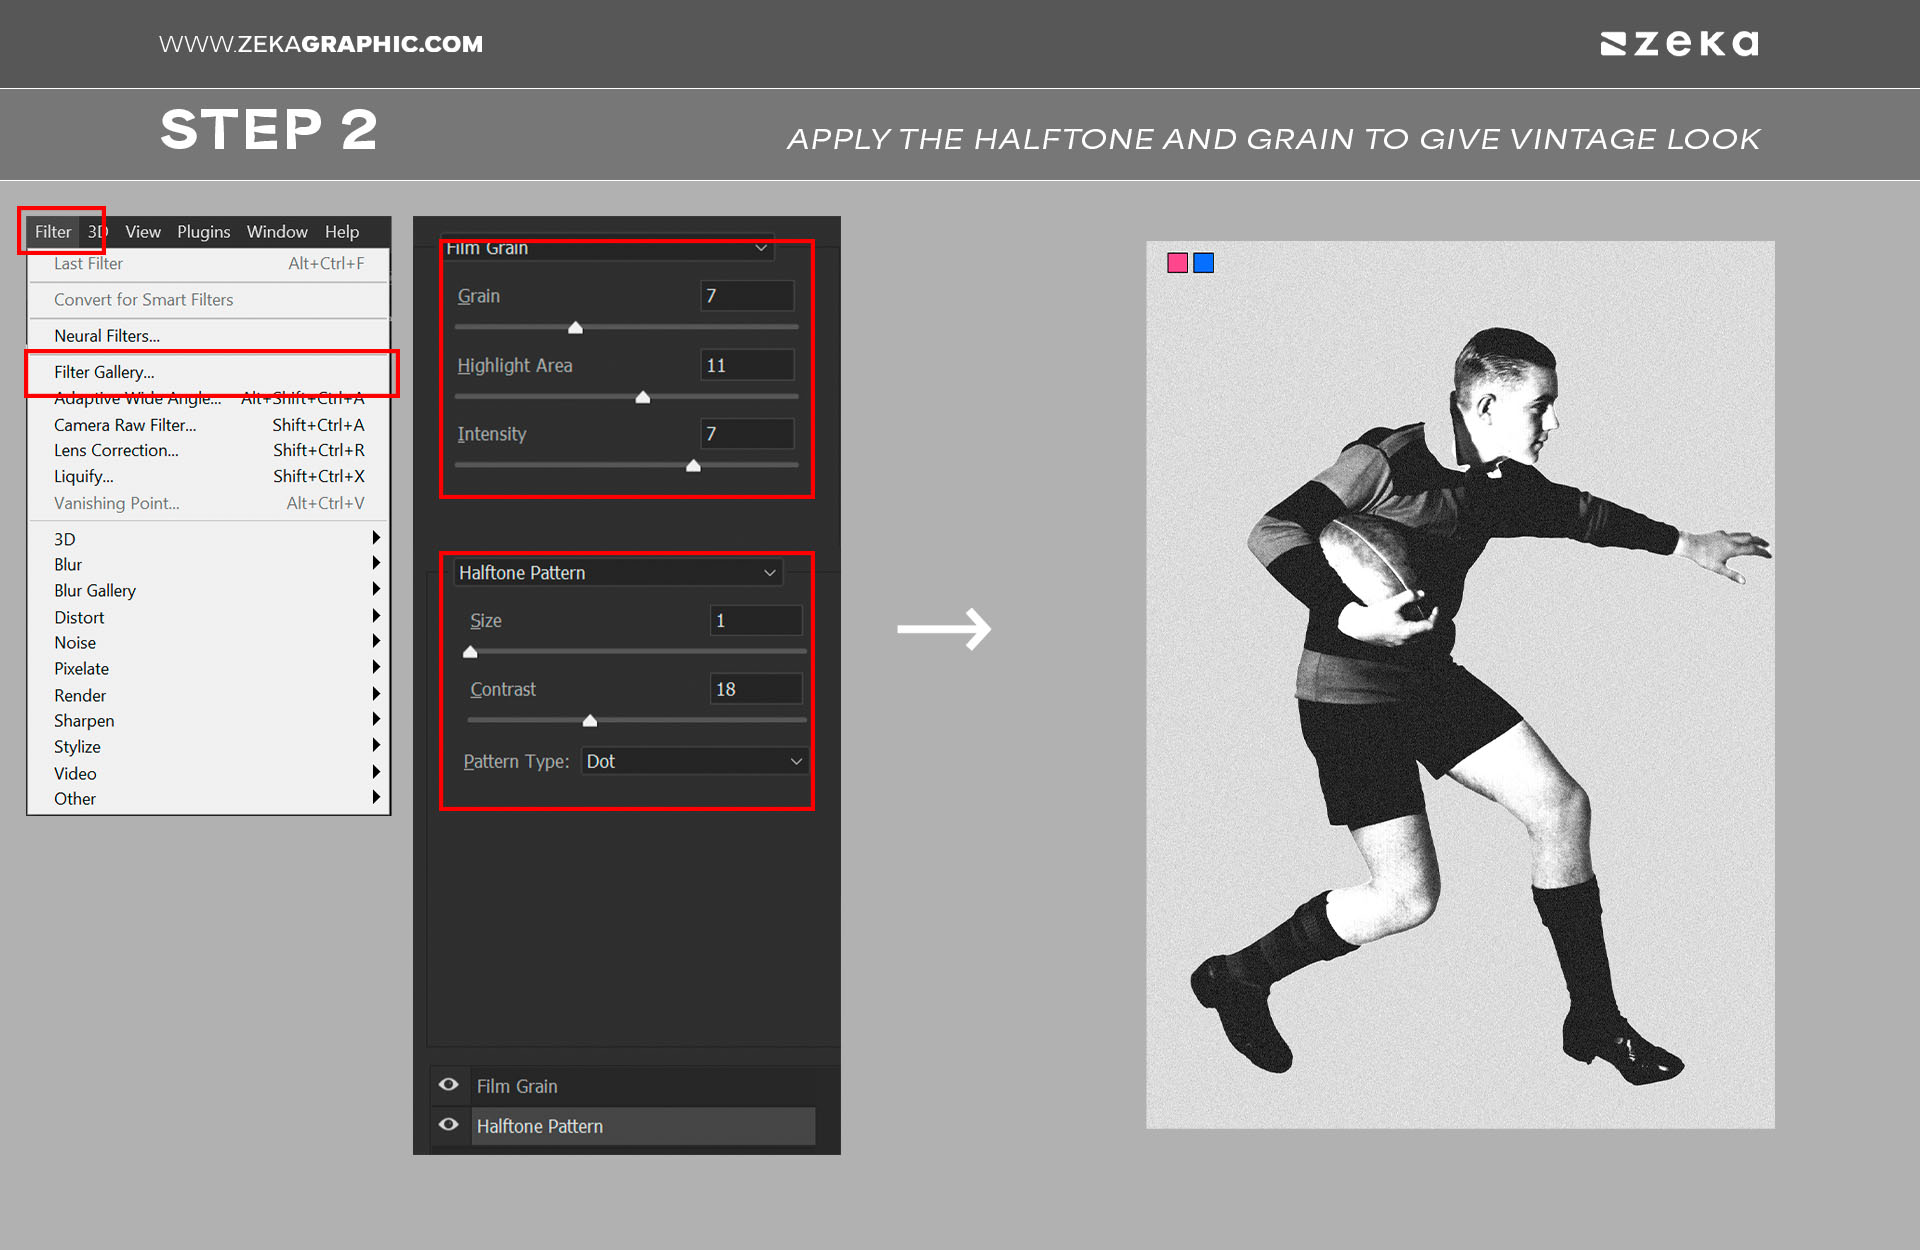
Step 2: Go To Filter > Filter Gallery and apply Film Grain with the following specs (Grain: 7 Highlight Area: 11 and Intensity: 7) and Halftone Pattern with the following specs (Size: 1 Contrast: 18 and Pattern Type: Dot), now we will have the vintage and printed look we are looking for.
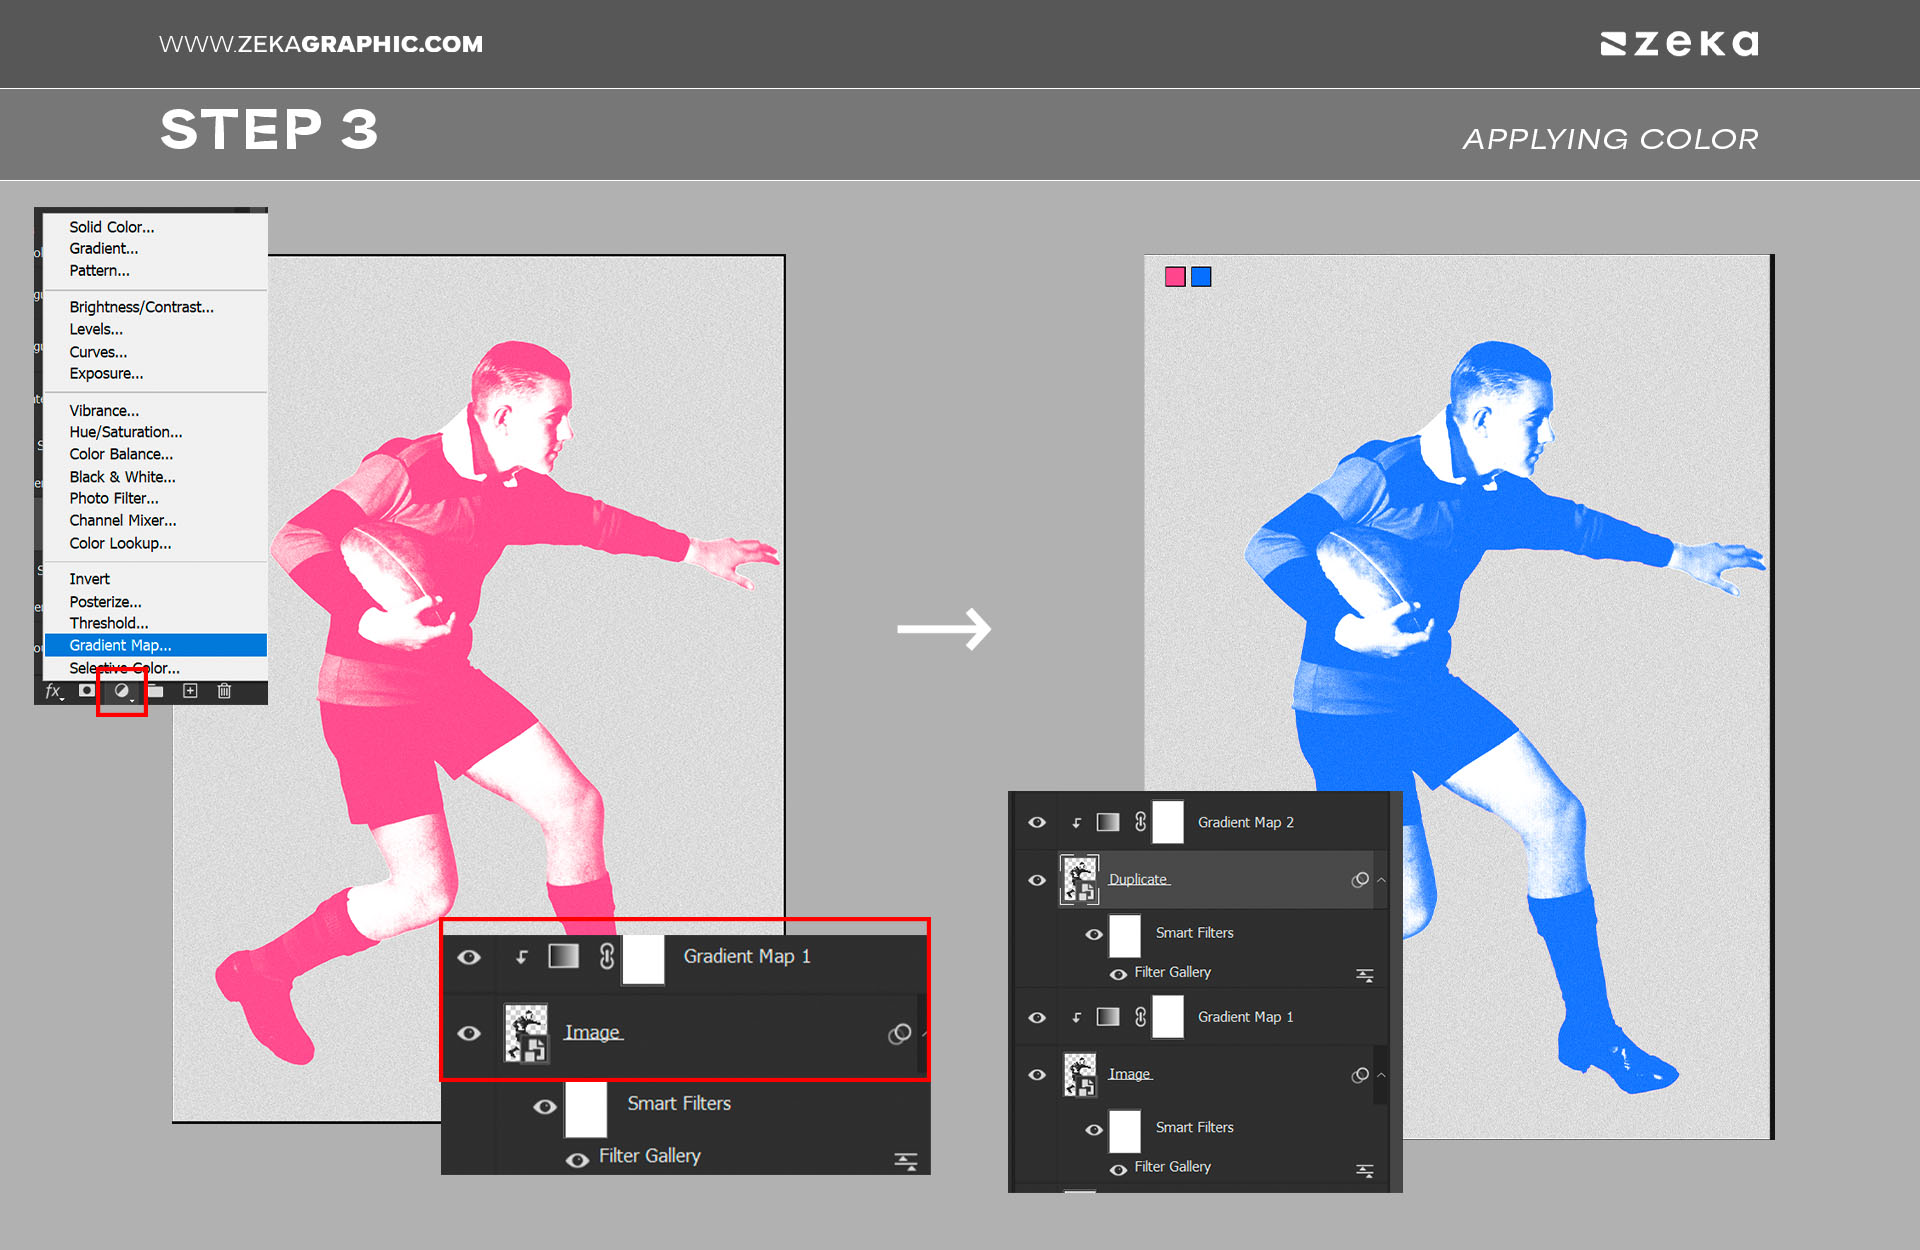
Step 3: Duplicate the layer, add a Gradient Map to the first layer with the Pink color (ff4a86) and White (ffffff) and create a Clipping Mask, repeat the process with the second layer, but in this case, for the Gradient Map use Blue (516eff) and White (ffffff).
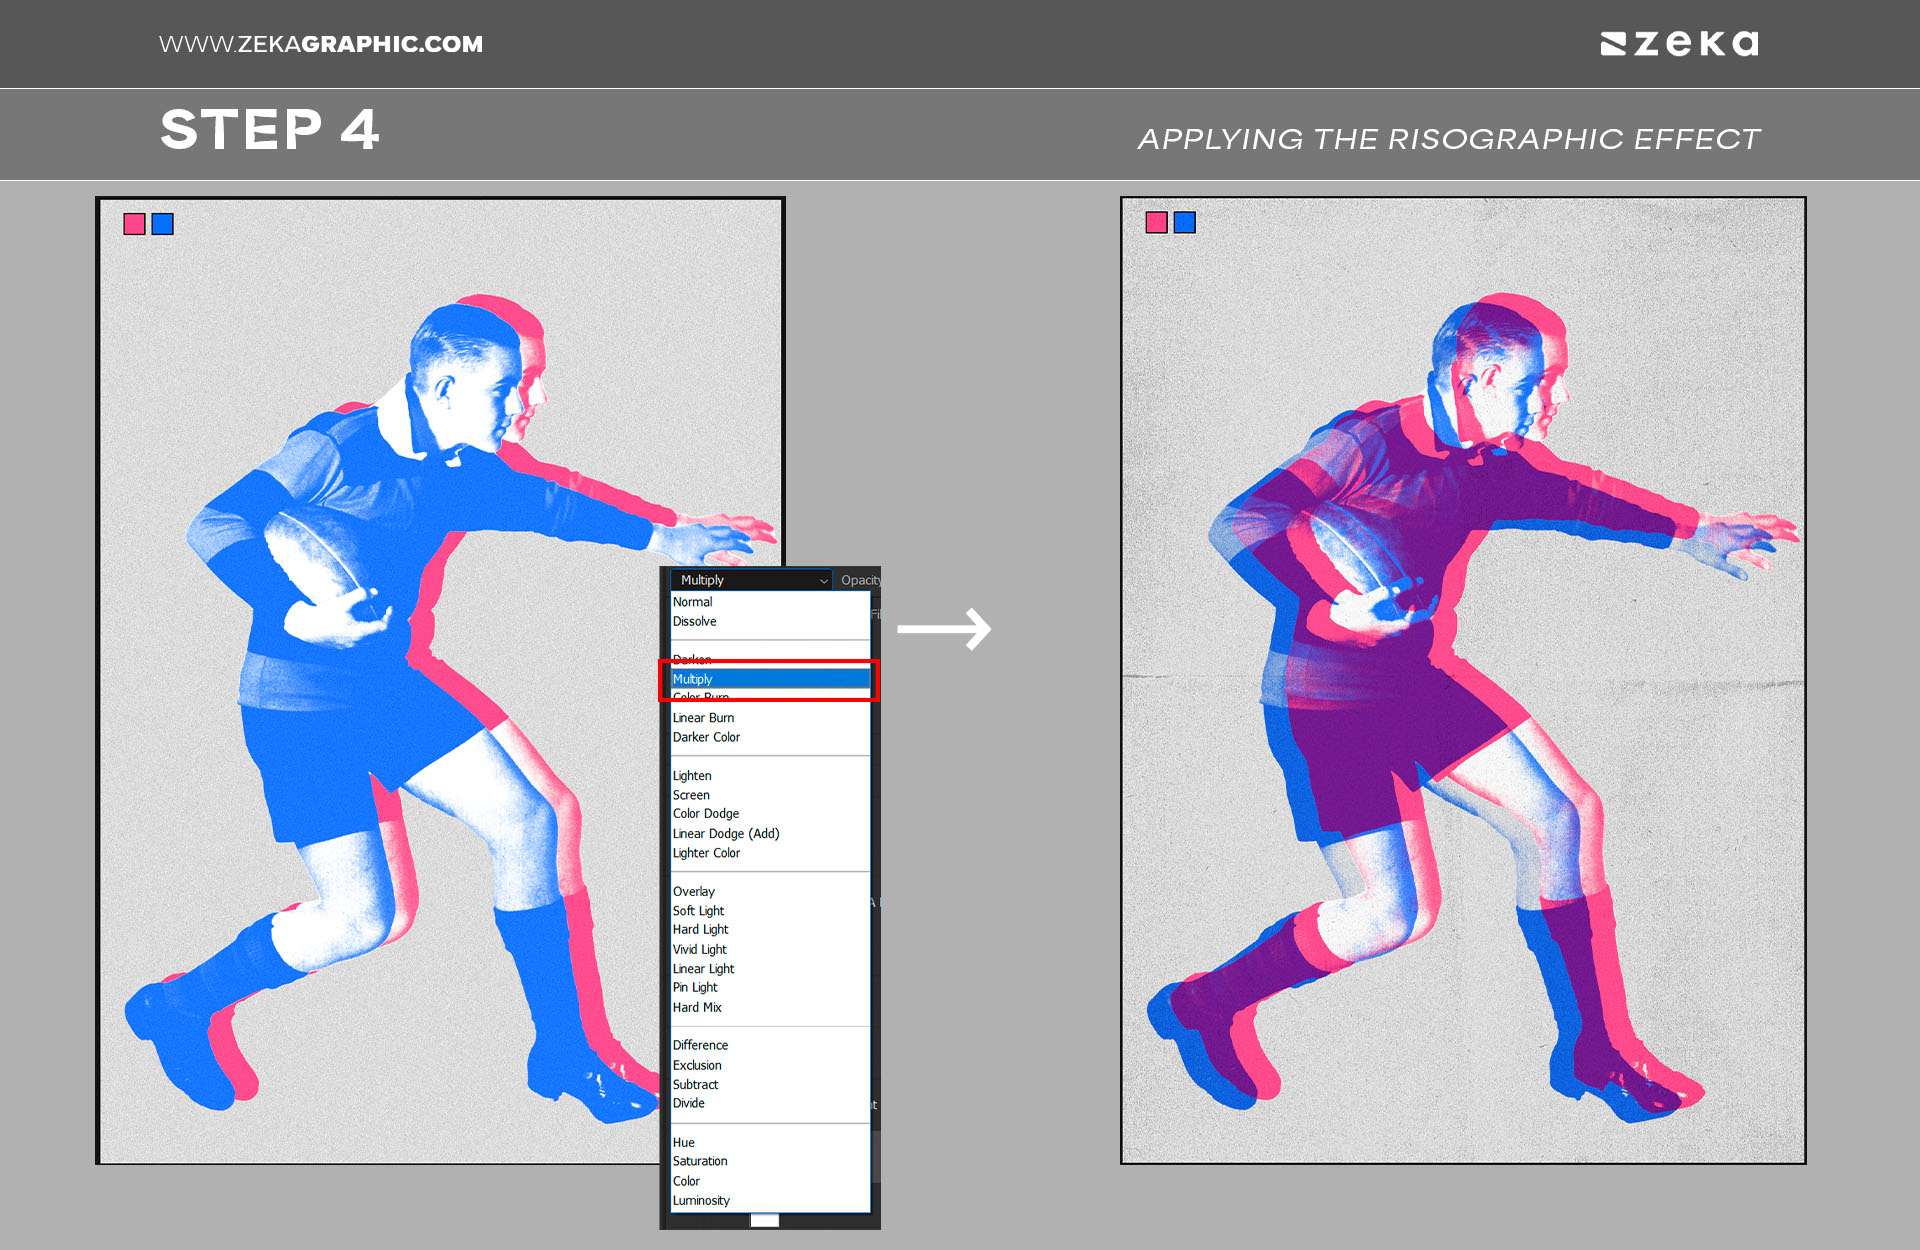
Step 4: Move the blue layer a little bit, and keep the Pink layer in the same position, now select the blue layer, and apply Multiply, additionally to create a more print and vintage feeling you can add some Paper Textures. Now you have the Vintage Risograph Effect.
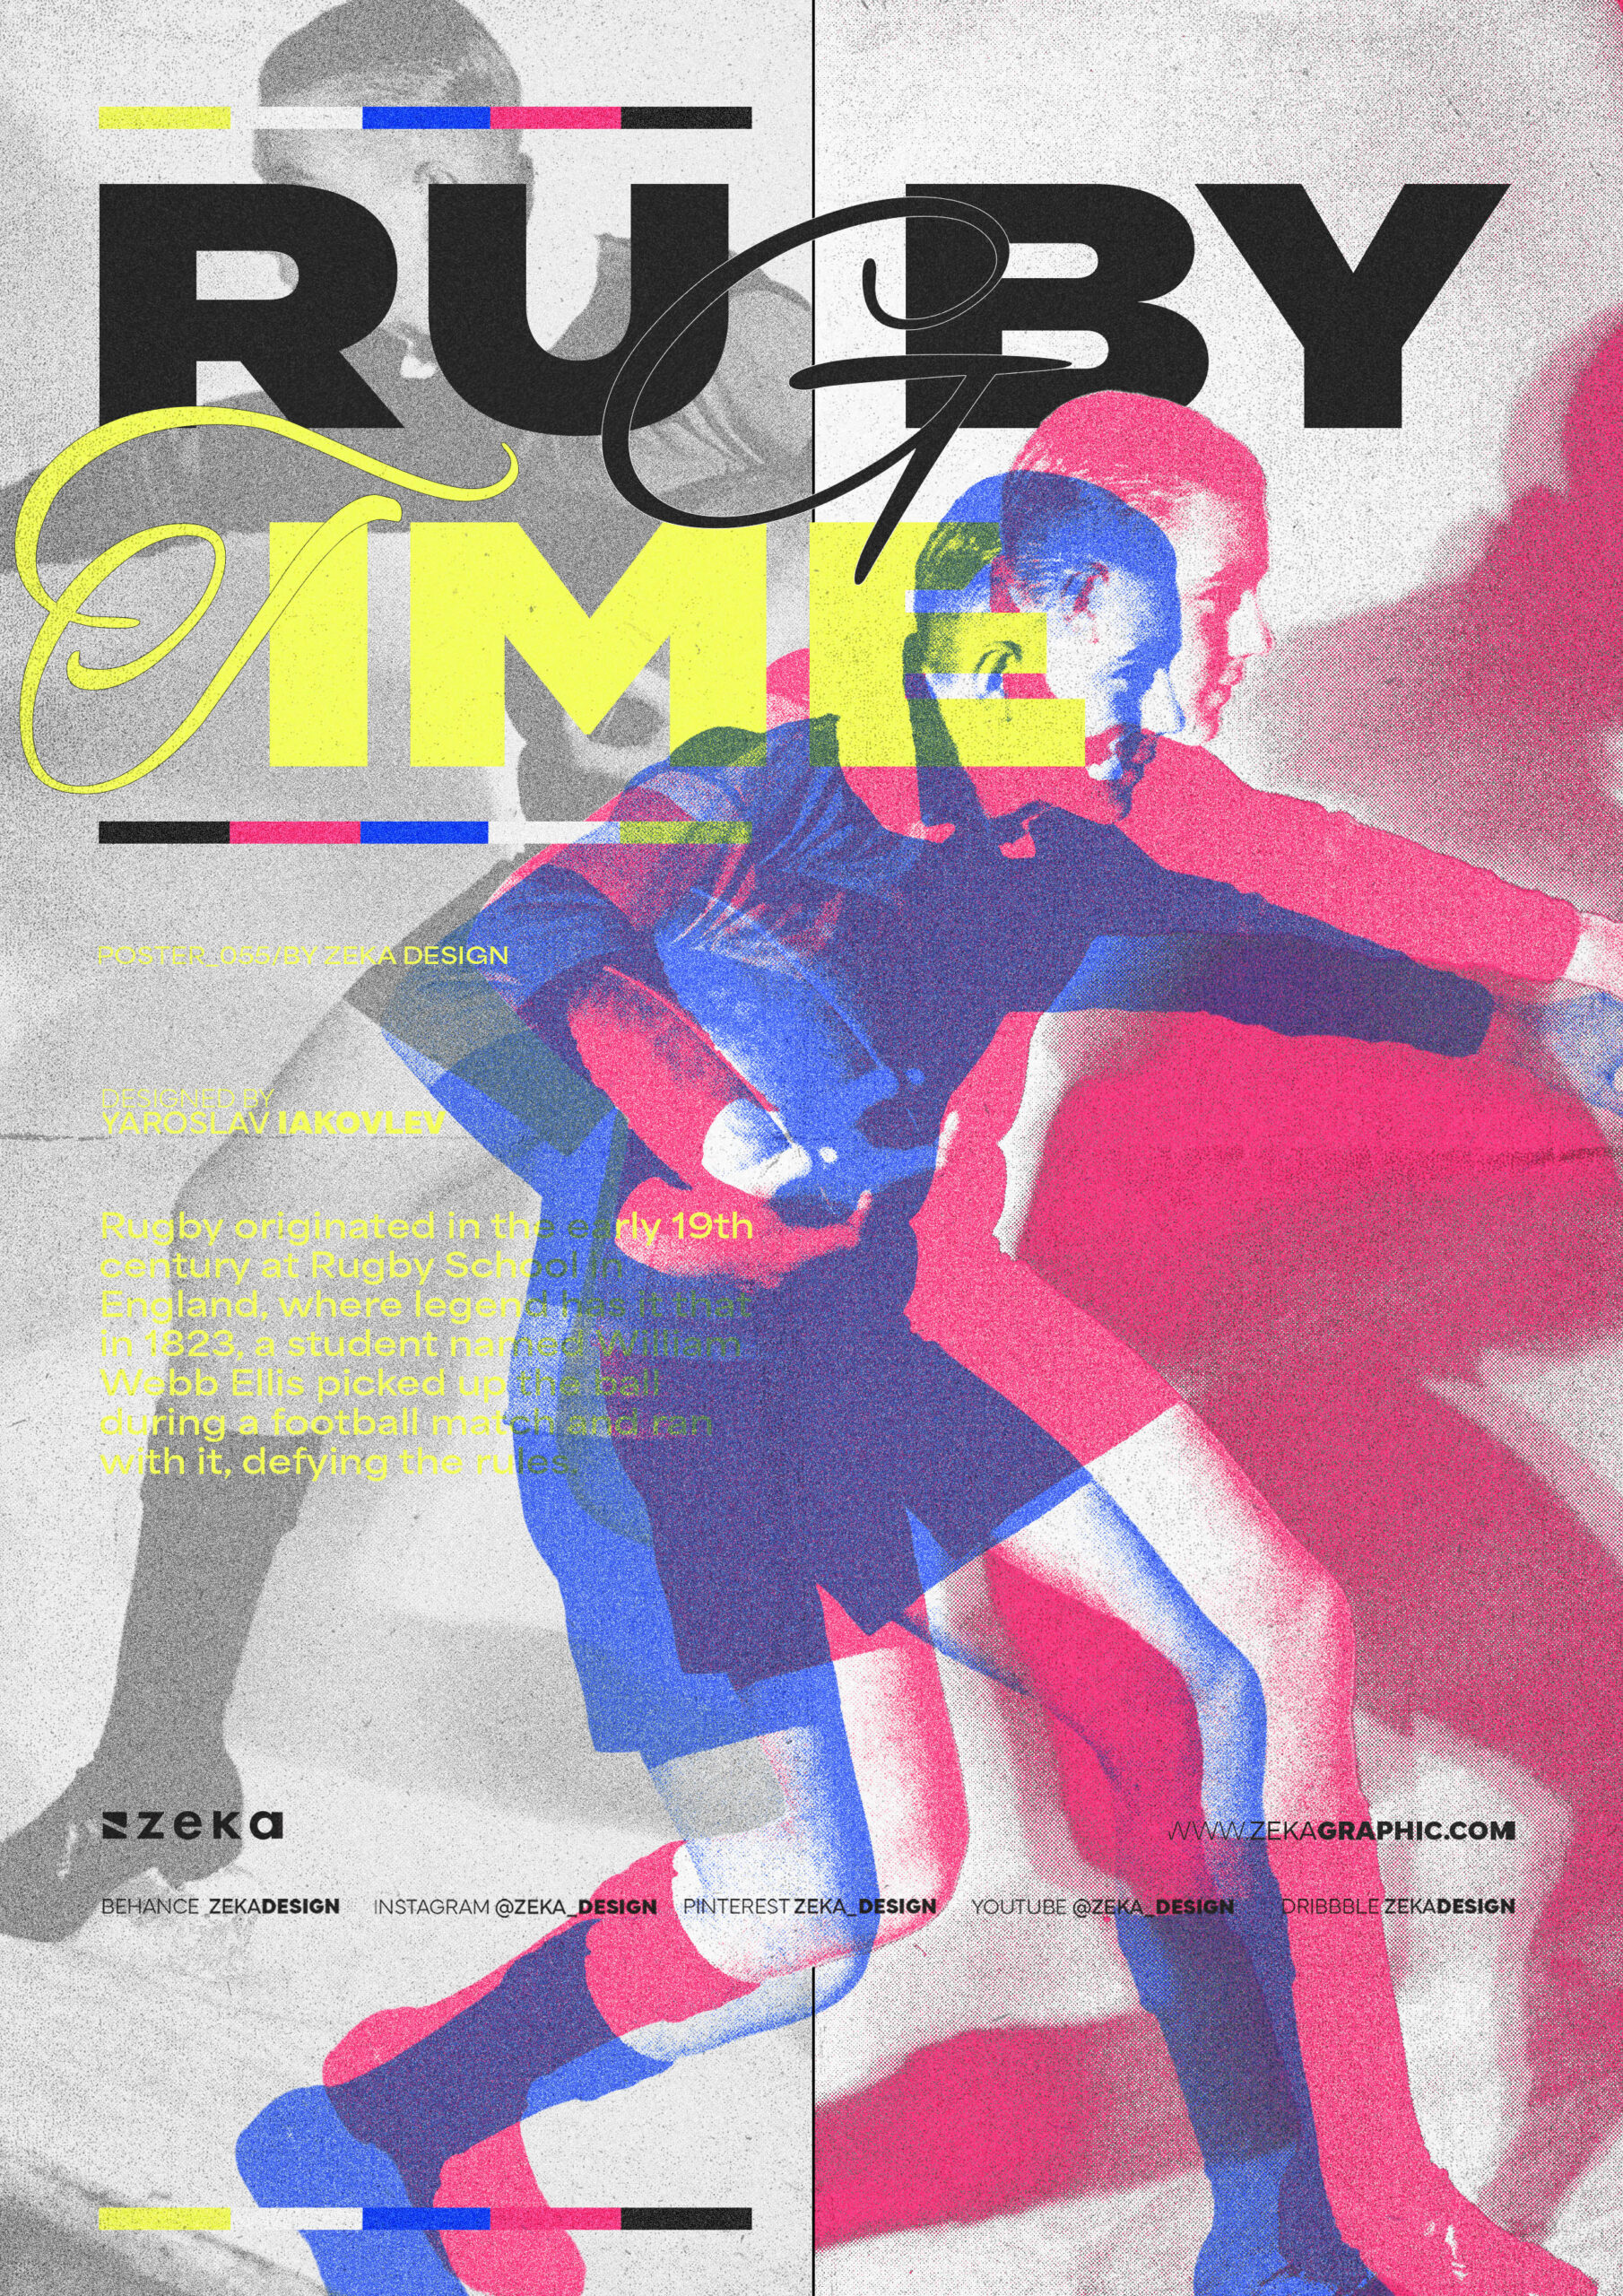
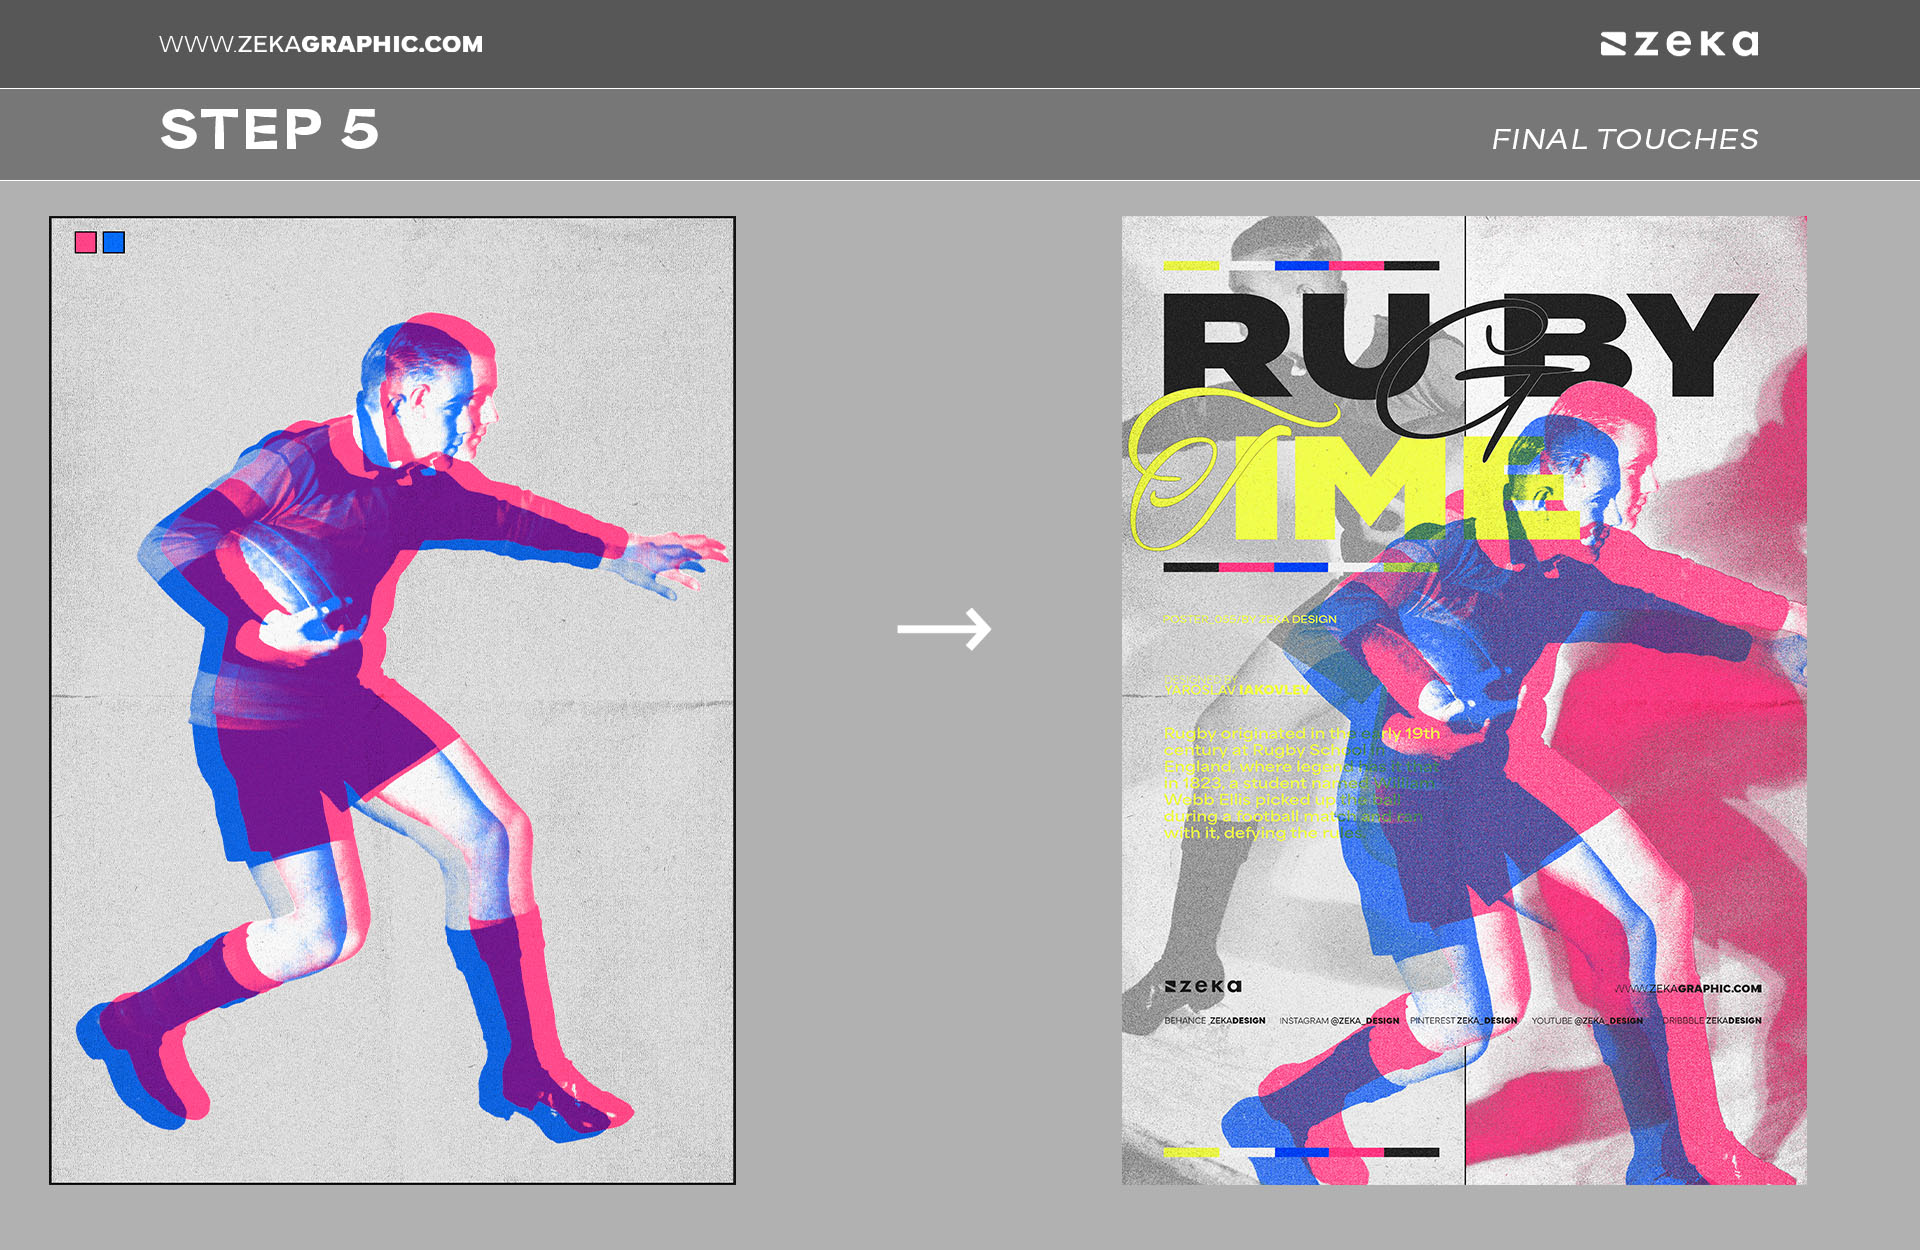
Step 5: Add more elements, text, filter or textures and you will have a cool looking Poster Design using Risograph Effect.
Advertisment
The beauty of the risograph effect lies in its imperfections and bold simplicity. By learning to replicate it in Photoshop, you can bring a touch of vintage artistry to your projects and give them a distinctive, memorable look.
So, are you ready to create your own risograph-inspired designs? Follow this tutorial, and don’t hesitate to play with textures and colors to make it uniquely yours!
Advertisment
Pin it for later!
If you found this post useful you might like to read these post about Graphic Design Inspiration.
Advertisment
If you like this post share it on your social media!
Advertisment
Want to make your Business Grow with Creative design?
Advertisment
Advertisment